Getting Started
We will be using GitHub Pages along with Visual Studio Code. Read left side, then right side.
Setting up GitHub Pages.
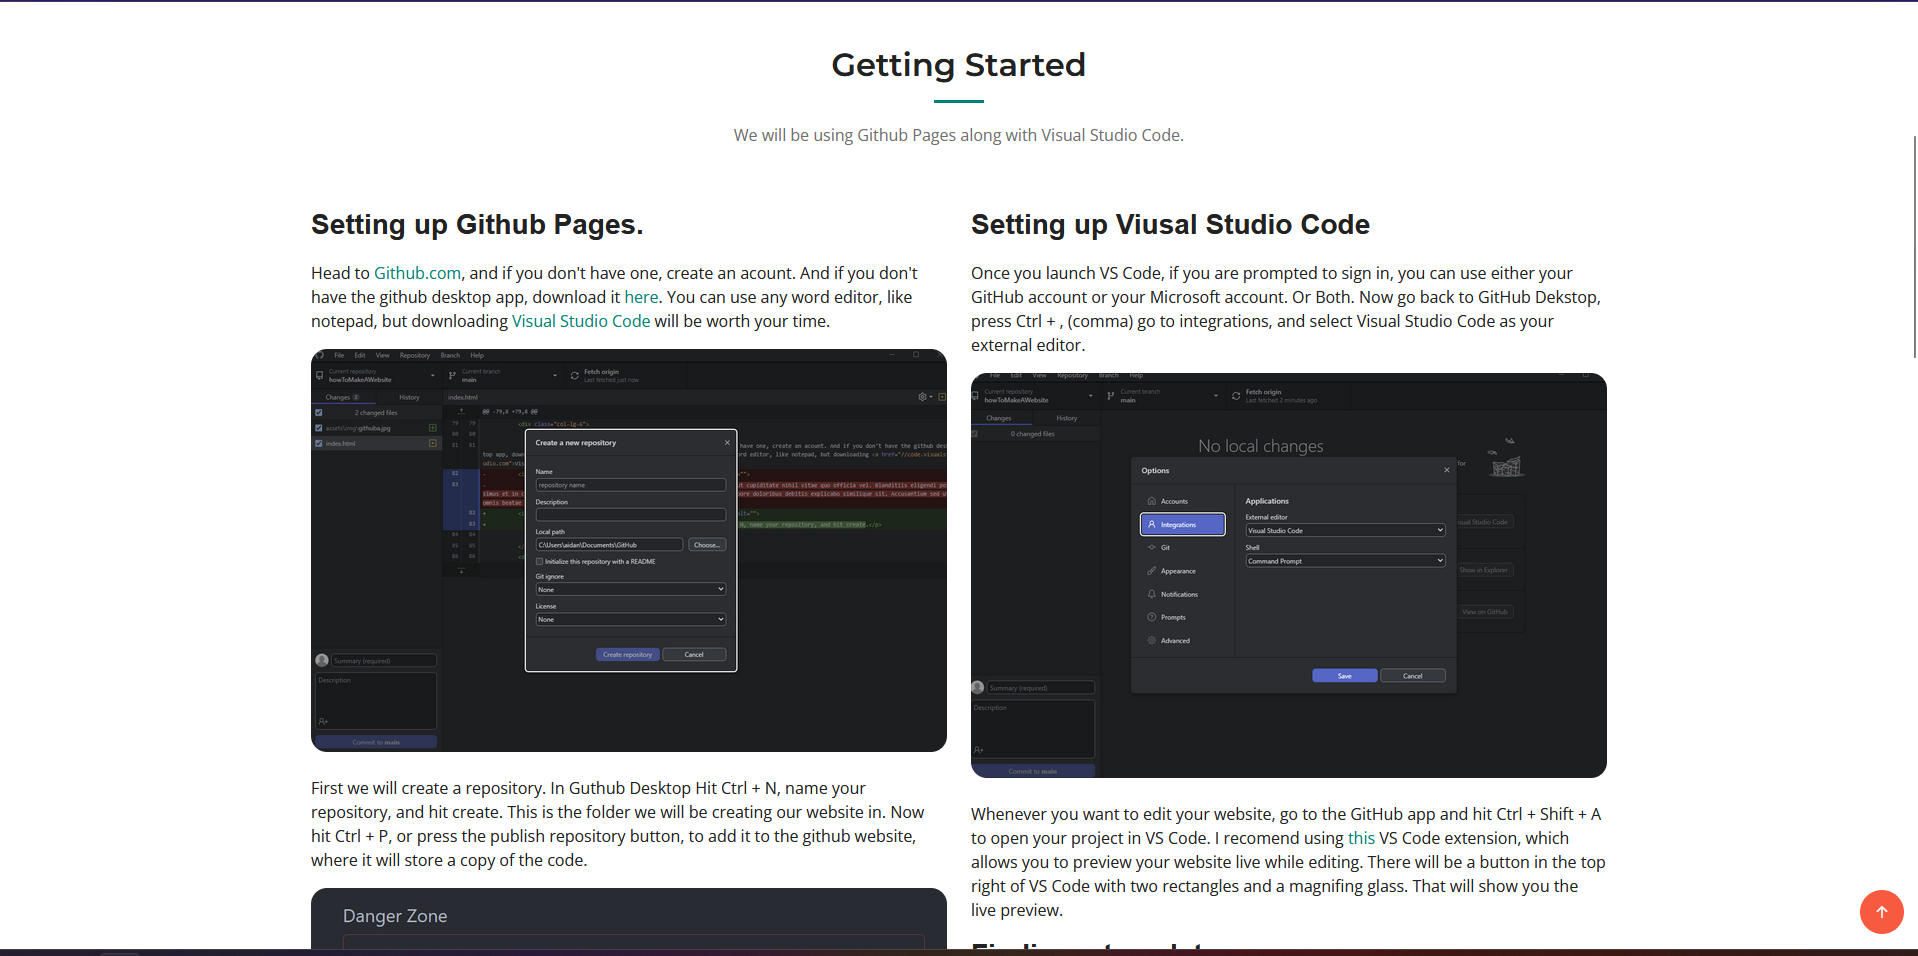
Head to Github.com, and, if you don't have one, create an account. And if you don't have the GitHub Desktop app, download it here. You can use any word editor, like notepad, but downloading Visual Studio Code is probably worth your time.
First, we will create a repository. In GitHub Desktop, Hit Ctrl + N, name your repository, and press create. This is the folder we will be creating our website in. Now hit Ctrl + P, or press the publish repository button, to add it to the GitHub website, where it will store a copy of the code.
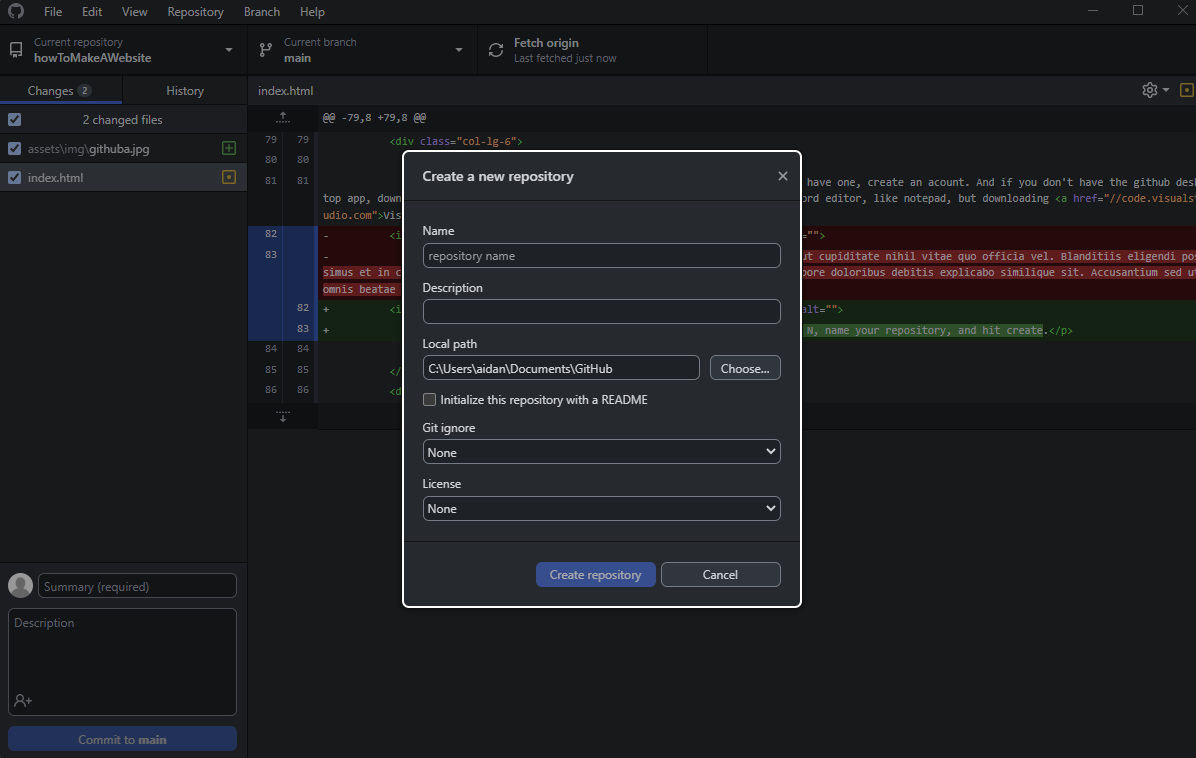
Now, still in the GitHub desktop app, press Ctrl + Shift + G. This will take you to the repository's page on the GitHub website. Go to the settings tab under the title of the repository, and scroll down until you hit the danger zone. Change the visibility to public. This will allow us to set up GitHub pages.
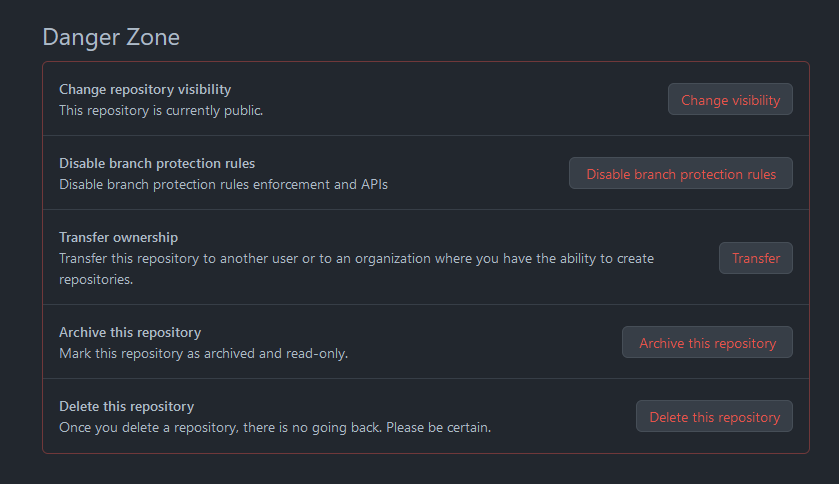
Still in the settings tab, press the pages button on the side menu, and enable pages. Also set the branch it's deployed from to main. It should look like this.
Setting up Visual Studio Code
Once you launch VS Code, if you are prompted to sign in, you can use either your GitHub account or your Microsoft account. Or Both. Or neither and don't sign in. Now go back to GitHub Desktop, press Ctrl + , (comma) go to integrations, and select Visual Studio Code as your external editor.
Whenever you want to edit your website, go to the GitHub app and hit Ctrl + Shift + A to open your project in VS Code. I recommend using this VS Code extension, which allows you to preview your website live while editing. There will be a button in the top right of VS Code with two rectangles and a magnifying glass. That will show you the live preview.
Finding a template
Go to bootstrapmade.com. Press live demo to see the selected website template as a website. I will be using the Impact template, located near the top. Once you picked one, press download. Once the download is completed, move the contents of the folder inside of the zip folder, to your website repository on your computer, you can find that by pressing Ctrl + Shift + F in the GitHub app. Now you can start making your website.
Tips to build your own website.
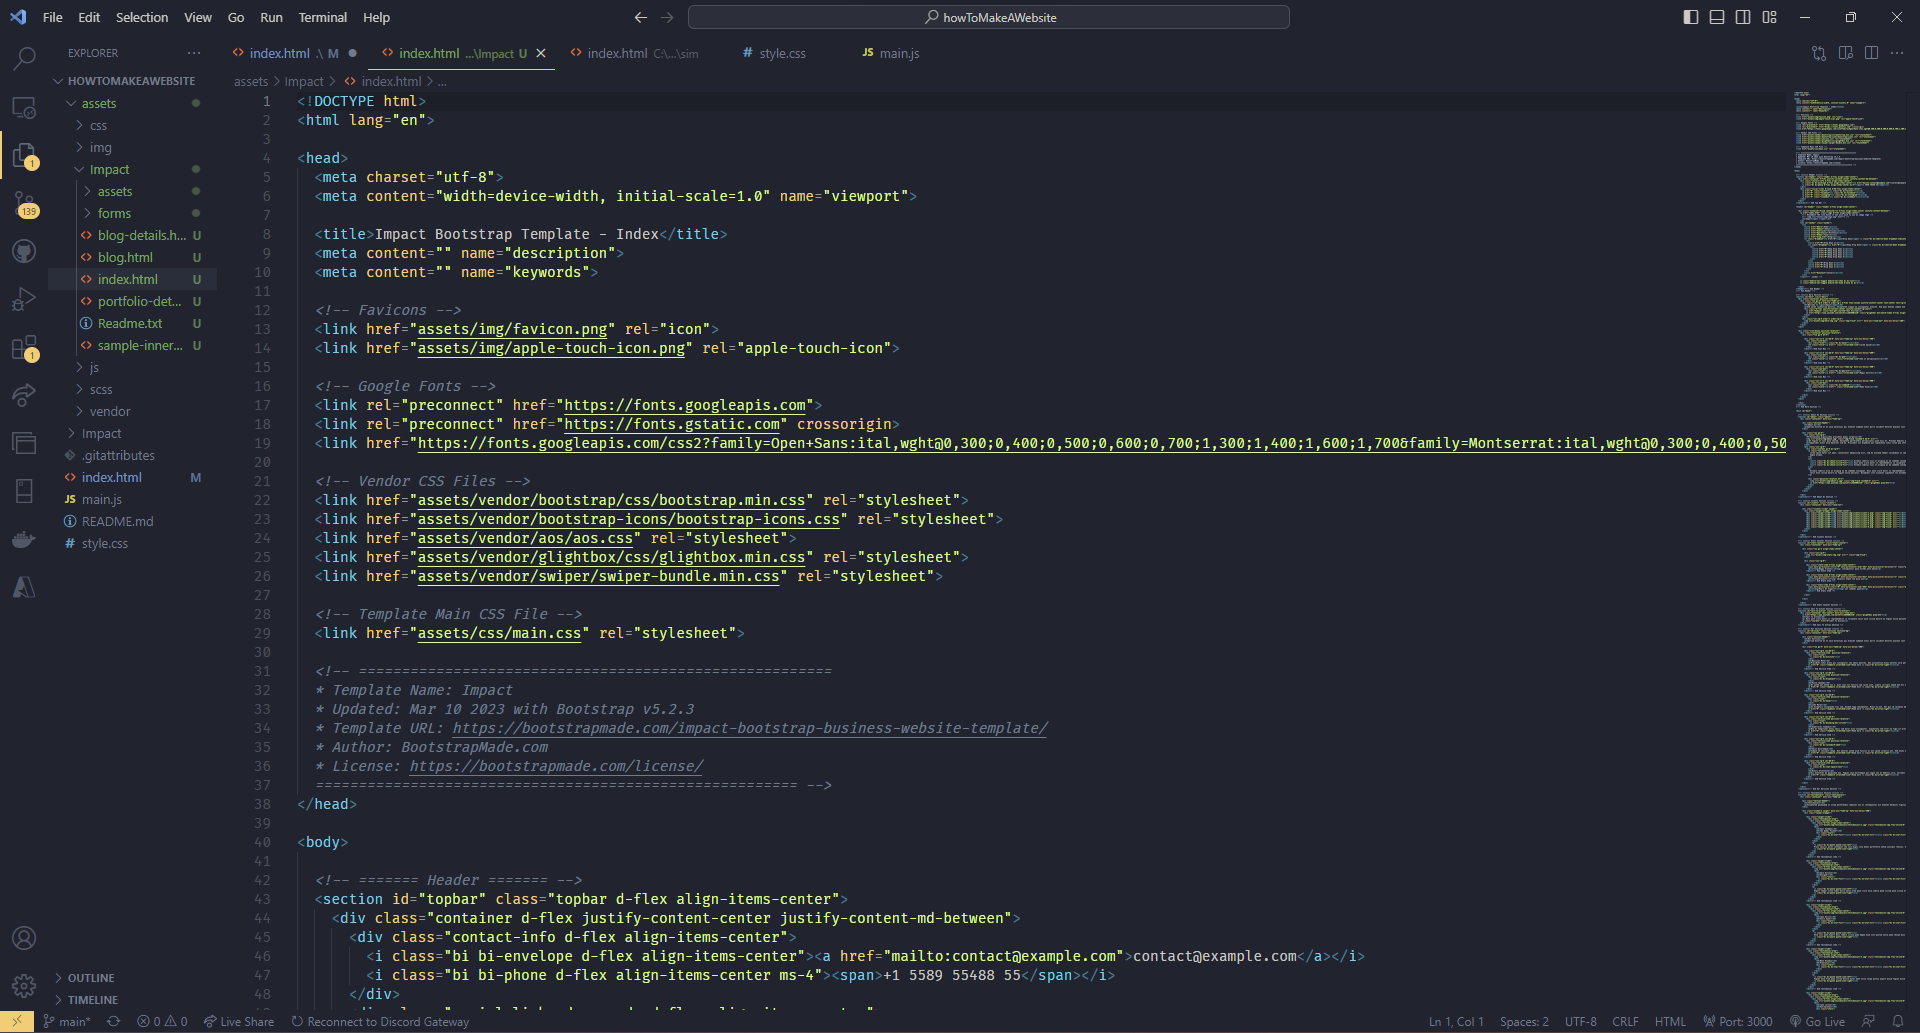
Once you open Index.html, VS Code will look something like this. Probably with different colours, as I am using the ayu mirage extension. First thing, on line 8, you should see a TITLE tag. That says what the text in the tab at the top of the browser will be. On line 13, is saying what the image beside the title at the top of the browser is. To change it, replace favicon.png in assets > img, in the repository folder on your computer. Remember that as you change things in your file, the numbers of the lines may change; and in most colour themes, the grey is the text. Have fun, and google a lot.
How to build this website
How to build a website on how to build a website on a 'How to Build a Website' Website
Set Up
On lines 8 and 13, change the title and icon of the website to "How to build a website" and an image of your choosing respectively. Also delete lines 41-100. Make sure to do the rest in order, as the numbers of lines will change. Delete line 51 (the video line). Also delete lines 59-95, and right under add three "< br >" on separate lines. Remove the spaces between the br and the triangles.
At this point, your website should look something like this. On line 47, change the text to 'How to build a Website'. And on line 48, just below it, give you guide a tagline. The Getting Started button will just by default scroll down.

Your Turn.
READ MAKING YOUR GUIDE FIRST. Try making the footer on your own for some practice. Now, using your critical thinking and googling skills, copy the format of the 'Getting Started' section, and explain to someone else how to build this website, on your new website. If you did everything right, it should look good.
Updating your GitHub Pages.
If you haven't already be doing this, go to the GitHub Desktop app and write a little summary in the bottom left. Then click commit. Click push origin in the middle of the screen. If you did everything right, in a couple of minutes, you can go to https:// + your GitHub username + .github.io/ + your repository name, and your website will be there.
Making your guide.
The about us section will start on line 68. Starting on line 72: change the header from About Us, to 'Getting Started'. Now, on line 73 tell the reader that we are using GitHub Pages and VS Code. On line 78, Tell the reader that we will be setting up GitHub Pages; and on lines 80 & 81, tell the reader how to set up GitHub Pages. Remember to include images in the "< img >" tags.
Now delete line 89-93. Also delete lines 84 & 85 and now, 95. Now make a new line under 83, and add the "< h3 >" and "" tags. Tell the reader that we will be setting up VS Code in between the two tags. Now explain how in the two text blocks that are located in lines 85 & 86 and 89 & 90. Remember to add images.
Now add 4 lines under line 91, the first with h3 tags, the next with 'p' tags and repeat. Using those, add how to choose a template and give them tips to create their own website. Remember to add images.
Now, your website should look something like the top of mine, if you are too lazy to scroll to the top, there is an image of it below.
Now, delete lines 107-169. On line 109, change both the id and class to 'about'. Delete lines 117 to 181. Now delete lines 125 to 818. They are not useful. Now on line 113 rename the services section to something along the lines of: "Building This Website."